ShockWiz Is Helping My Speed Rise, and My Splits Fall
The ShockWiz suspension Tuning System has been around now since 2016. It’s a tool that attaches to front and rear suspension systems, and measures the velocity of compression, rebound, and air pressure ramping, to optimize contact with the ground.
I was an original backer for their KickStarter program in 2015, but the bike geniuses at SRAM quickly saw the merits of the system, and purchased it from the founder, which helped bring it to market.
I have videos of me trying the system out in 2016 and 2017 in Dallas, TX, but it was not until I moved to Northern Nevada that I was able to really use the data for better bike splits.
Suspension Optimization Is Completely Under-Utilized by 99% of the Mountain Bike Population
I remember when I got my first ‘Real’ mountain bike. It was a Trek 9800, and it had Trek’s own ‘Showa’ suspension fork, with about 2 inches of travel. This was in the Pre-OCLV days. The tubes were carbon, glued to aluminum joints, and in hindsight, it was kind of like riding a wobbly goblin. The frame flexed laterally, the suspension really didn’t go where you wanted to point it, and the tires had wire beads – and no grip. I was still hooked and basically dedicated my life to mountain biking.
This was in 1992, and here I am, 33 years later, still studying suspension.
MOST suspension setups for new cyclists go like this;
- Buy a bike with suspension, hoping that this feature will help the cyclist enjoy more trails with more control and comfort.
- Shop asks general questions about weight.
- Cyclist and bike are placed on a rack for stability, the suspension is cycled a couple of times for compression and rebound, and slight adjustments are made to the air pressure to set ‘sag’, which is a term that determines how much travel the suspension is set to, for initial comfort and control. USUALLY this number is about 20% front and rear.
- Cyclist takes the bike home, never to be seen again.
This is NOT the ideal approach!
ShockWiz Data Is Empirical
The ShockWiz is a cost-effective way for mountain bikers to get more out of their suspension investment.
I’ve probably got over 1500 hours of data collected on my ShockWiz sensors, over 3 bikes, since I first purchased them. Every ride, I trap the data. Suspension Optimization really cannot be done in just one ride. Honestly, it can’t be done over a weekend of rides. It really takes about 15-20 hours of riding, at a consistent location, to get the most out of your suspension. No two rides are the same, but they’re often similar enough that, upon review, a ShockWiz owner can make the recommended changes to their suspension, and then keep riding and collecting more data. Sometimes you can make changes at home, with air pressure, or tokens. But there are times when suspension requires the work of a Suspension Specialist.
An Example:
I purchased my latest mountain bike in the Summer of 2022. It’s an Intense Sniper T Pro, with 120mm of travel in the front and rear. The suspension system is from Fox. I began collecting ShockWiz data from the first ride, and in September of 2022, I visited Mike Davis at MAD Racing, for my first suspension changes, which were based on the information the ShockWiz had presented. I then made adjustments with the dials on compression and rebound in 2023 and 2024, recording every ride.
The most consistent result for the rear suspension, from this period (I did not ride the mountain bike in 2023, when we were living in Sacramento), was that ‘COMPRESSION’, both low-speed and high-speed, needed to be ‘Softer’, to optimize suspension use. In the Summer of 2024, I recorded about 34 rides, over 60 hours, on ONE LOOP. I know, I know, it’s boring to ride the same loop over and over again, but here’s why I did this; for consistency’s sake. Every ride, the suspension was ‘Open’. The trail would change over the summer and after storms, but I kept everything as consistent as possible.
Fox Suspension HQ was NOT Interested In My Data…
and they would not make adjustments to my rear shock to accommodate my needs.
Why? They claimed that the ShockWiz didn’t work on their suspension. Ironically, I find this reply to be underwhelming. Honestly, I don’t really believe it. The rebuild also took about six weeks, and I lost a lot of ride time.
I left their office in November, and began a quest to find a new Suspension Optimization Engineer.
From November of 2024, through March of 2025, I rode the fork and shock when weather allowed, and continued to gather data on my suspension.
Fall/Winter 2024 ShockWiz Values
The data from my completely rebuilt-to-stock-settings rear suspension showed the following:
I Found My New Suspension Optimization Engineer!!!
On March 11th of 2025, I happened to drive past a bike shop in Reno, about which I knew very little. I walked in, introduced myself to Marty the owner and Teague, the head mechanic, and started a conversation. I asked about their suspension acumen, and when I learned that Teague had a Nitrogen tank, which is a necessity for modern air-canister suspension systems, I was convinced. I had found my new Suspension Optimization Engineer!
Over the next few days, we corresponded with images from the ShockWiz software, and Teague believed he could help me optimize that rear shock. I left the bike with them, and picked it up on March 20th of 2025, along with a HIGHLY DETAILED DESCRIPTION of EVERY MINUTE DETAIL that had gone into modifying the rear shock! Here’s what it read:
Float DPS: 210psi
ProPedal setting: 1
LSR: 9
Volume spacers: 0.6in³
Rebuilt damper seals in rear shock, as main shaft seal was beginning to “flatten out” and discolor, particularly since the shorter stroke DPS series are prone to wearing their damper shaft at static sag point. Replaced trunnion eyelet with a remote-compatible eyelet, push-to-lock config, cable down, large volume (LV). Set IFP to spec depth and pressure.
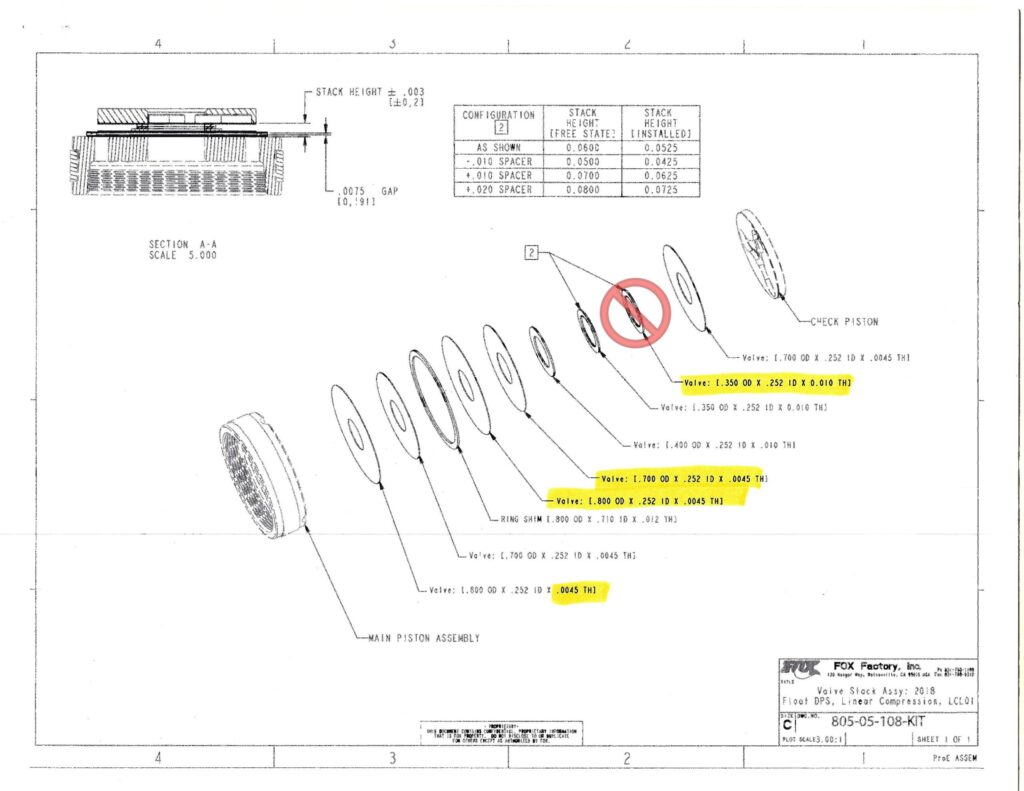
Retuned compression shims to lighten up high-speed. Serial number shows original shock compression tune was linear compression firm (LCF), and was retuned lighter by Mike Davis to linear compression medium (LCM), which was a change in thickness of one shim in the stack. We retuned shock another step toward soft, using Fox’s linear compression light (LCL01). If ShockWiz thinks it still needs to be lighter at this point, we have one more step we can take with the LCL tune, eliminating one more support shim from stack.
Needless to say, I was SUPER IMPRESSED.
Linear Compression
Let’s decipher just what Teague did to improve my Compression settings.
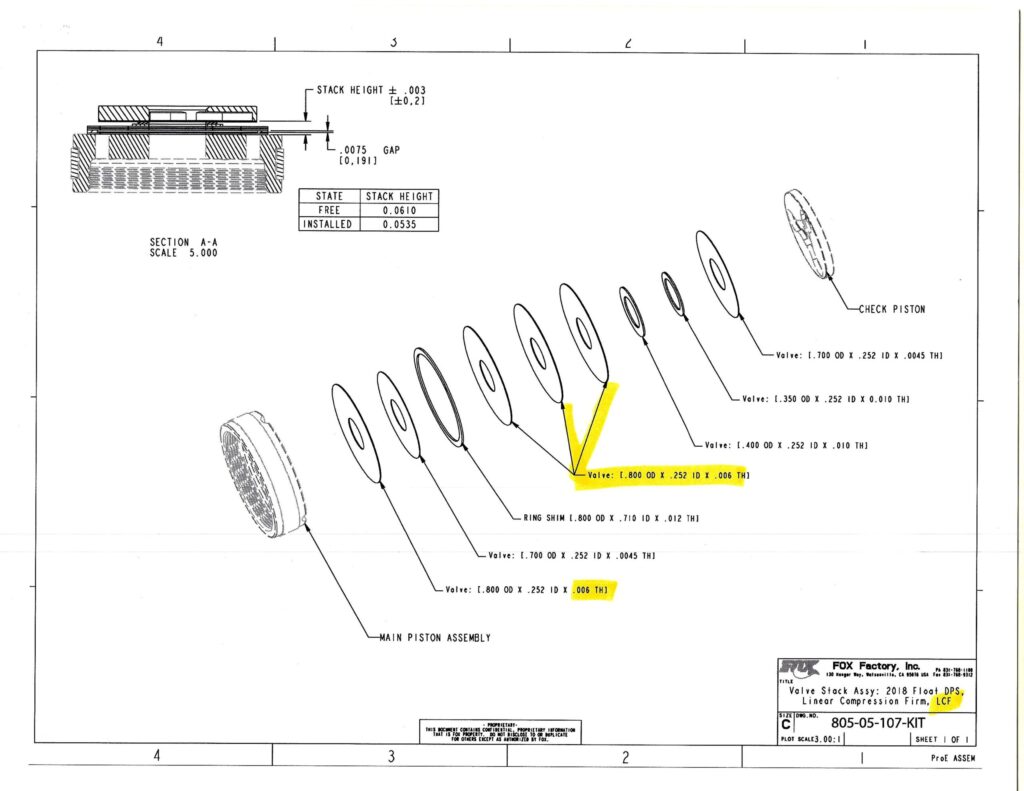
“…original shock compression tune was linear compression firm (LCF), and was retuned lighter by Mike Davis to linear compression medium (LCM).”
This is what the shims look like in Linear Compression FIRM setting:
In late 2022, Mike Davis, of MAD Racing, changed the Compression shim setting to ‘Linear Compression MEDIUM’.
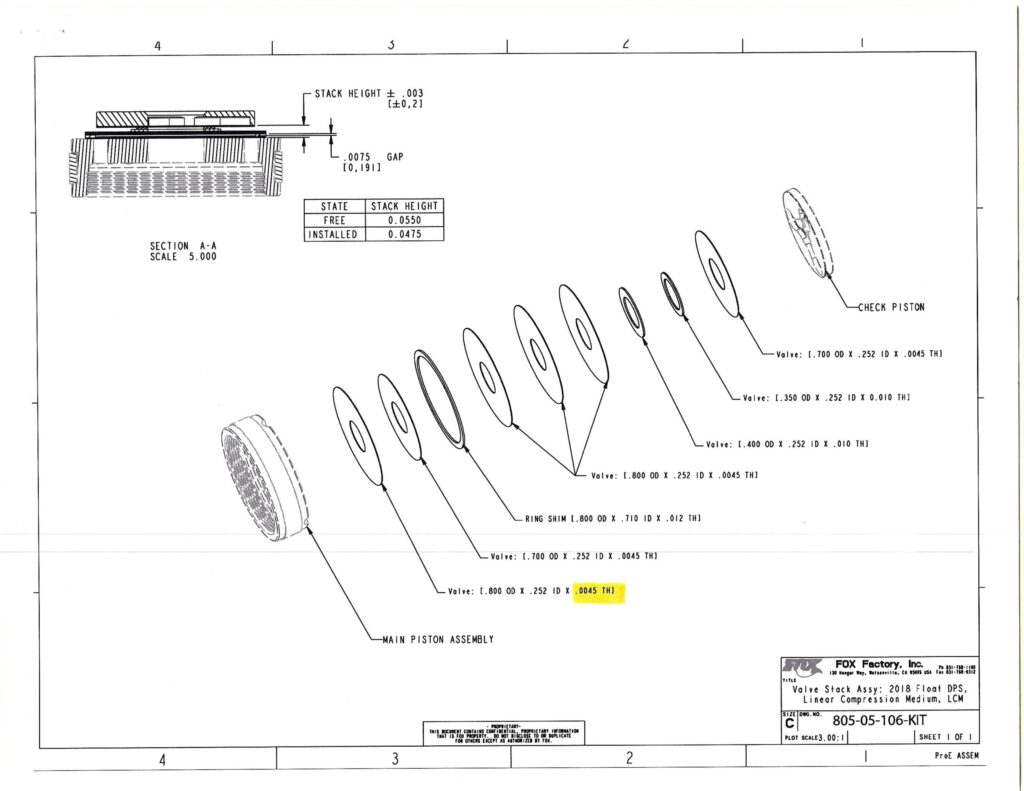
This was the setting I used from late 2022 through early 2025, and no amount of dial adjustment or air pressure adjustment would improve slow and high speed compression.
“We retuned shock another step toward soft, using Fox’s linear compression light (LCL01).”
Here’s what the shock shim stack looked like after Teague’s expert adjustment…

I then set out to ride and determine whether these tiny adjustments had made enough of an impact on my shock’s Compression.
What did the ShockWiz Say?
I need still softer compression….
FINAL CHANGES
SO…. As of this writing, I’ve been working on this post for about 3 months. We’ve had more weird weather, but as of Mid-May, it looks like it’s finally getting dry enough to ride consistently.
Let’s look at the last phrase of Teague’s Comments from March…
“If ShockWiz thinks it still needs to be lighter at this point, we have one more step we can take with the LCL tune, eliminating one more support shim from stack.”
I returned to Mountain Dog in late April, and requested the final adjustment. We removed one shim.
We made the change on the 3rd week of May, and I rode the bike with minimal changes from June 1 through the end of July. That’s a total of 47hrs and 30 minutes.
Final Result:
Here’s a GIF of my results, so you can see for yourself.
Perhaps more importantly, here are the Suggestions and Detections for those same rides…
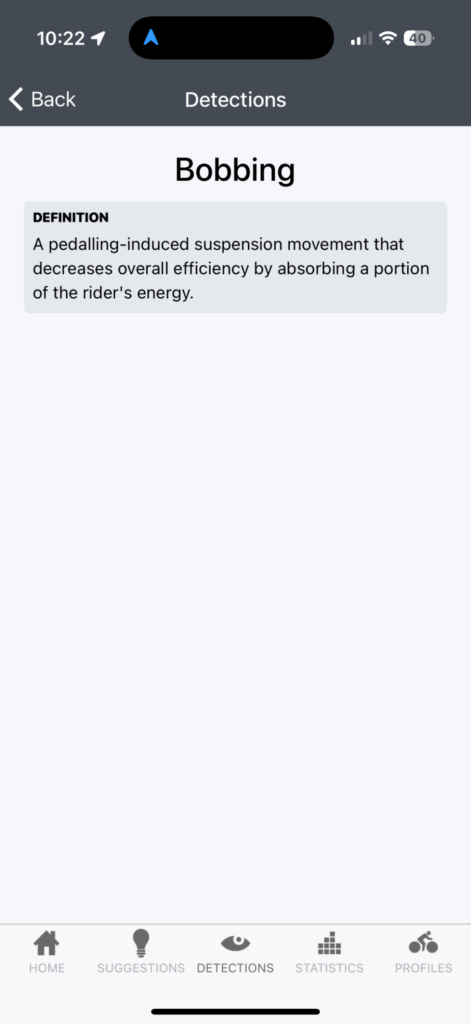
As you can see, even after all of this work to tweak the suspension system, I STILL have been unable to optimize my high-speed and low-speed compression. However, when you look at the Detections and Suggestions, I DID have several episodes of ‘All Green’ status. the two exceptions to that revealed the detection of ‘Bobbing’ and ‘Bouncing’, the definitions of which I’ll include in the images below.

Conclusion
The best way to sum up mountain biking is with the comment, “No two rides are the same.” That said, it’s possible, with the ShockWiz system, to get a degree of consistency and less variability, in suspension performance.
Here are a few rules to go by:
- Start with tire pressure. Less is more, and the penalty for greater rolling resistance is more than offset with traction, cornering, safety, and comfort. Suspension starts at the contact with the Earth.
- You’re never going to get the same numbers for every ride, every time. The environment is just not consistent enough for this. Trail conditions change by the year, the month, the day, even the hour. Aim for higher numbers that provide safety, comfort, and performance.
- PREFLIGHT YOUR SUSPENSION. I’m a bad group ride mountain biker; I’m always checking tire pressure, shock pressure, chain lubricity, and brake effectiveness. With suspension, it’s a good idea to leave the bike out in the sun or exposed to ambient temperature and humidity for your ride, after you’ve arrived at the trail head. ALWAYS check your suspension air pressure, and aim for consistency. Use the ShockWiz app to record your damping, rebound, tokens, trail conditions, everything. I’ve never successfully figured out how to EXPORT this stuff, but screenshots are easy, and you can compile them in folders online.
- GET A LOCKOUT. I’m convinced that modern all-mountain or cross-country rigs are built for suspension, but there is a LOT of energy lost when climbing without a suspension lockout. Now, this WILL affect your Shockwiz scores to some degree, but it’s worth the calories saved.
- Don’t obsess over one ride’s suggestions. Instead, look for a pattern. I rode this bike for over TWO YEARS before I was able to get the values up to a level where I feel confident. I didn’t make changes after every ride. Instead, I compiled data over 5-10 rides, and when a recommendation for damping was consistently showing up, I would alter the suspension with that in mind. The work done with the valves and washers in the rear Fox setup show this.
I’m going to continue to ride this bike with the ShockWiz, but sadly, it’s no longer built, and that means I’ll have to hunt on Ebay for any further units. I’d LOVE to get this on my wife’s mountain bike, so I may do just that.
Anyway – I think I started this post in late 2024, and it’s now February of 2026. It’s time to get this up. Thanks for reading, comments are always welcome, and as always; #Enjoytheride!